Science blog
|
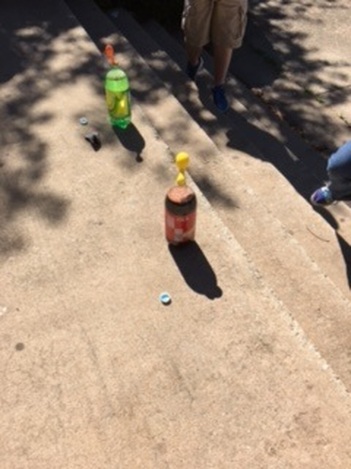
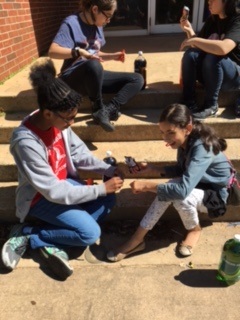
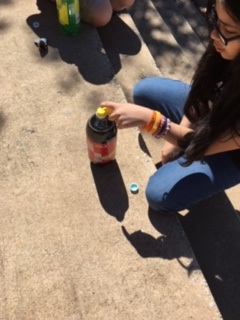
I have found that it is pretty hard to find Pop Rock candy nowadays, which is a shame! But, if you ever come across it, pick up a packet and a 1 liter bottle of soda and you can really see some cool stuff! Here is what you do: Pop Rock Experiment Supplies:
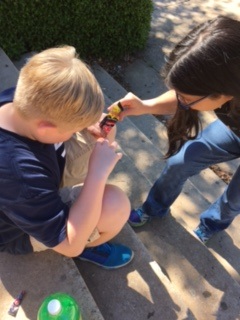
Step 2: Removed the lids from our four soda bottles and put the balloon over the opening being careful not to pour the pop rocks in until all the bottles were ready. Step 3: Lift the balloon from its side so it is able to pour the pop rocks into the soda and take a step back. Step 4: Watch your balloon to see what happens! The Science Behind it: Pop Rocks have small carbon dioxide bubbles inside. That is what makes the candy “pop”. Carbonated Beverages also have carbon dioxide in them (that is what makes them carbonated). When the pop rocks are dropped into the soda the carbon dioxide is able to separate from the high fructose corn syrup (which sweetens the soda). Because the carbon dioxide has no where to go it rises up, filling up the balloon. Want to see where I got the idea? Here it is! www.123homeschool4me.com/2015/03/pop-rock-science-experiment-for-kids.html?m=1
0 Comments
You may find yourself super hungry during the break, which is probably a result of your boredom, but that is neither here nor there! If you are hungry, why not involve science! Here is what you do: How to Make Rock Candy Materials
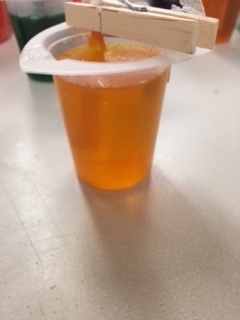
Step 1: Combine equal parks of sugar and water in a saucepan and heat until all of the sugar is dissolved. Step 2: Slowly add more sugar in small amounts until it will no longer dissolve in the water (for each cup of water, 3 cups of sugar is needed) Step 3: Get to the point where the water starts to look cloudy. That is the point when no more sugar is dissolving and the perfect sugar saturation has been reached. Step 4: Add candy flavoring and continue to heat the water until it comes to a simmer. Step 5: Remove the sugar-water from the heat and allow it to cool. While it is cooling you can prepare your skewer. Cut the skewers to a desirable size for the jars you are using. Dip the sticks in water and roll them in sugar. Step 6: Allow the sugar coated sticks to dry. While those are drying you can prep your jars. Once your sugar-water is cool enough, pour it into jars and add food coloring if desired. Then, once the sticks are dry, place them in the jars. Step 7: Make sure the sticks are not touching the bottom or the sides of the jar by using the clothespins Step 8: WAIT for at least a week for them to grow. Science behind it: Why does the string need to be soaked and then dried? The string will provide the surface on which the crystals will grow. As water evaporates from the string, small crystals of sugar will encrust the string. These tiny seed crystals provide starting points for larger crystals. Future growth will be concentrated around these points. What makes the crystals grow? Two different methods will contribute to the growth of the crystals on the string. You have created a supersaturatedsolution by first heating a saturated sugar solution (a solution in which no more sugar can dissolve at a particular temperature) and then allowing it to cool. A supersaturated solution is unstable—it contains moresolute (in this case, sugar) than can stay in a liquid form—so the sugar will come out of solution, forming what's called a precipitate. This method is called precipitation. The other is evaporation—as time passes, the water will evaporate slowly from the solution. As the water evaporates, the solution becomes more saturated and sugar molecules will continue to come out of the solution and collect on the seed crystals on the string. The rock candy crystals grow molecule by molecule. Your finished rock candy will be made up of about a quadrillion (1,000,000,000,000,000) molecules attached to the string. Want to see the finish product? Here is where I got the idea: www.growingajeweledrose.com/2015/02/rock-candy-experiment.html
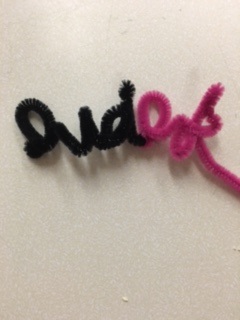
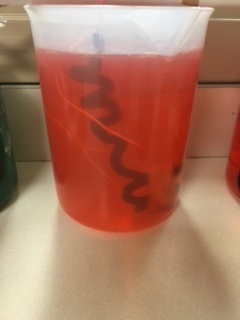
So for those of you that are looking for an update on the status of my ring finger on my left hand, it is still single! Which is fine because I'm perfectly okay with being Mercury, Venus, Earth, Mars, Jupiter or even Pluto! (No rings.. the pun is for you Justin!). Anywho, we have been working hard here at Summer Camp and are able to fit in an experiment a day which is great! Today we did a 'Crystal Name' lab which looks into the science behind solutions, dissolving, and also bonds. They haven't dried yet so we don't know what the final product will look like but I will post pictures when they are done :) Here is what you can do: Crystal Names Lab Supplies:
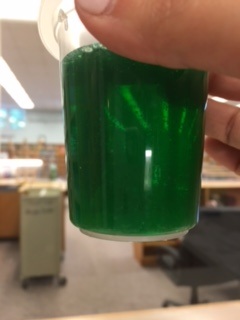
Step 1: Form your name using the pipe cleaner. While you are waiting, tie a string to the middle of a pencil to be used later in the lab. Step 2: Boil a pot of water Step 3: Add 3 tablespoons of borax per cup of hot water Step 4: pour the water into each container and stir until all the borax is dissolved Step 5: Add a couple drops of food coloring to your container and lower the letters into the solution. This should already be tied onto a pencil so it can be suspended in the jar easily Step 6: WAIT! For a couple days for the water to dissolve. The Science Behind It When borax is dissolved in water a suspension is created. A suspension is a mixture that has solid particles {the borax} that are large enough for sedimentation {settling out}. As the borax begins to settle, it starts to crystalize on all the surfaces it comes in contact with – including the pipe cleaner letters. As the borax continues to settle out, it builds crystals on top of other borax crystals creating a thick layer. Want to see a finished product? Go to where I got the idea from! www.playdoughtoplato.com/kids-science-crystal-names/
|
AuthorWrite something about yourself. No need to be fancy, just an overview. Archives
June 2016
Categories |

 RSS Feed
